9 Crown Molding Ideas That Instantly Class Up Your Space
Ready to give your ceilings the red carpet treatment? Crown molding does that magic trick where a room suddenly looks taller, richer, and way more intentional. These ideas range from simple DIY wins to designer-level moves you can totally pull off. Pick one, grab a miter saw (or a patient friend), and let’s make your rooms feel custom, fast.
1. Go Big With Stacked Profiles
Want drama without getting tacky? Stack multiple pieces of molding to create a custom, high-impact profile. You’ll get that fancy millwork look for a fraction of custom prices.
How To Build The Look
- Combine base cap, cove, and crown pieces
- Use a simple backer board to create height
- Caulk every seam for a seamless “one-piece” finish
Layering lets you fine-tune scale to your room’s height. Perfect when your walls feel tall and bare and you want a true designer finish.
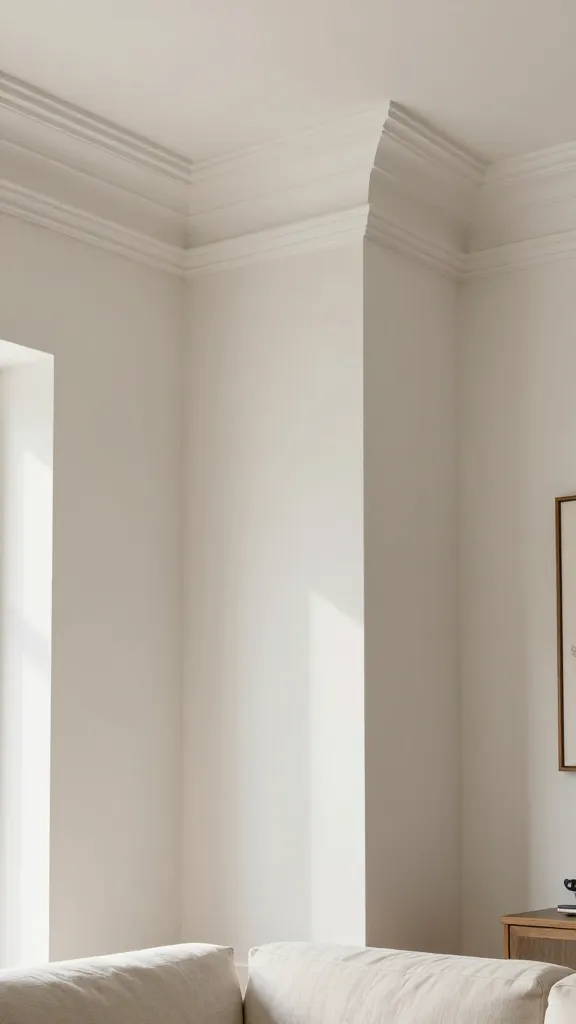
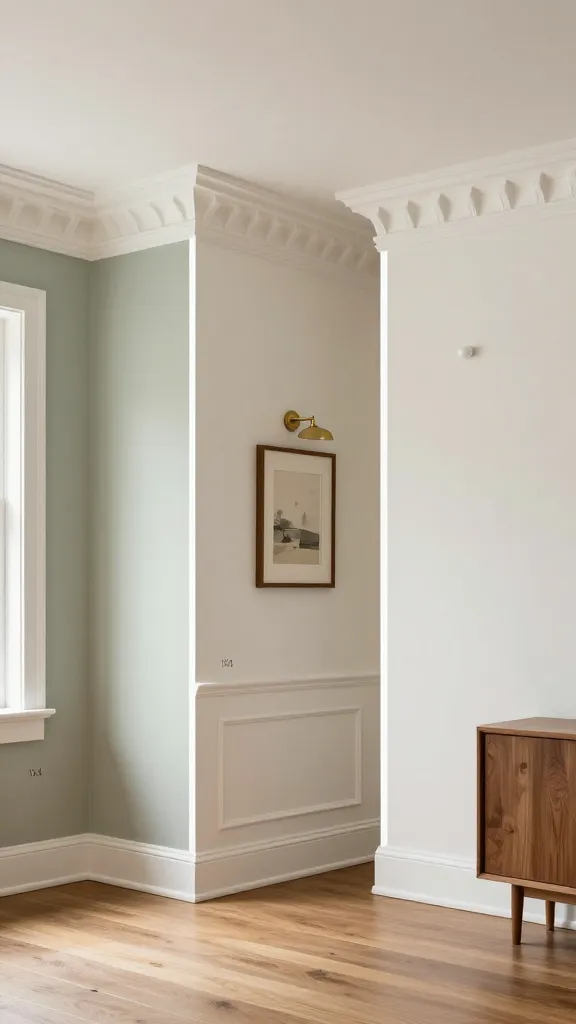
2. Paint It The Same Color As The Walls
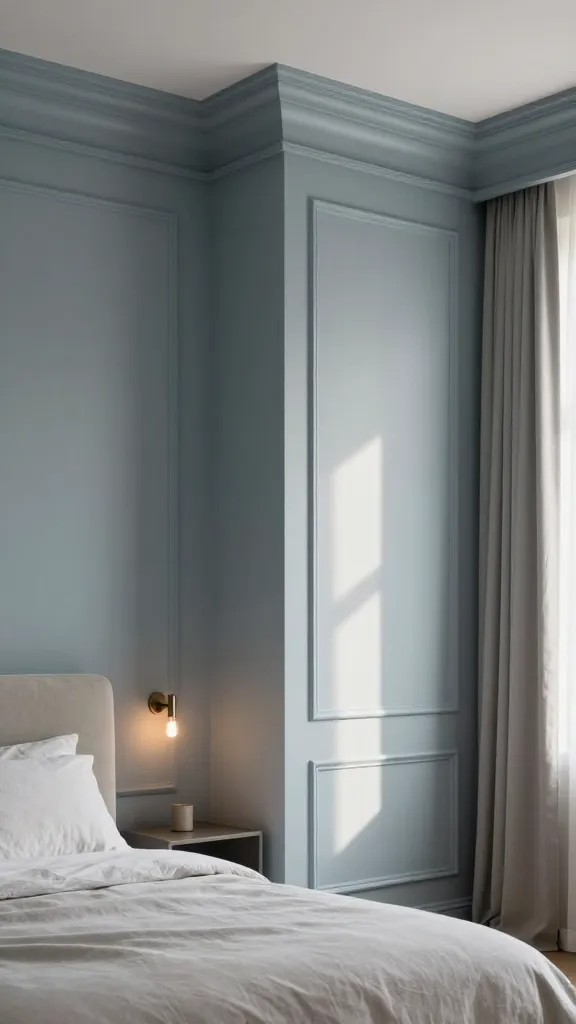
Monochrome crown molding looks modern and luxe. It extends your walls visually and makes your ceilings feel higher—no magic beans required.
Tips
- Use the wall color in a semi-gloss or satin for subtle contrast
- Keep the ceiling a touch lighter to lift the room
- Choose a calm neutral or moody tone for a cocooning vibe
This trick works beautifully in bedrooms and dining rooms where you want an elevated, soft look without high contrast lines.
3. Contrast Molding For Bold Character
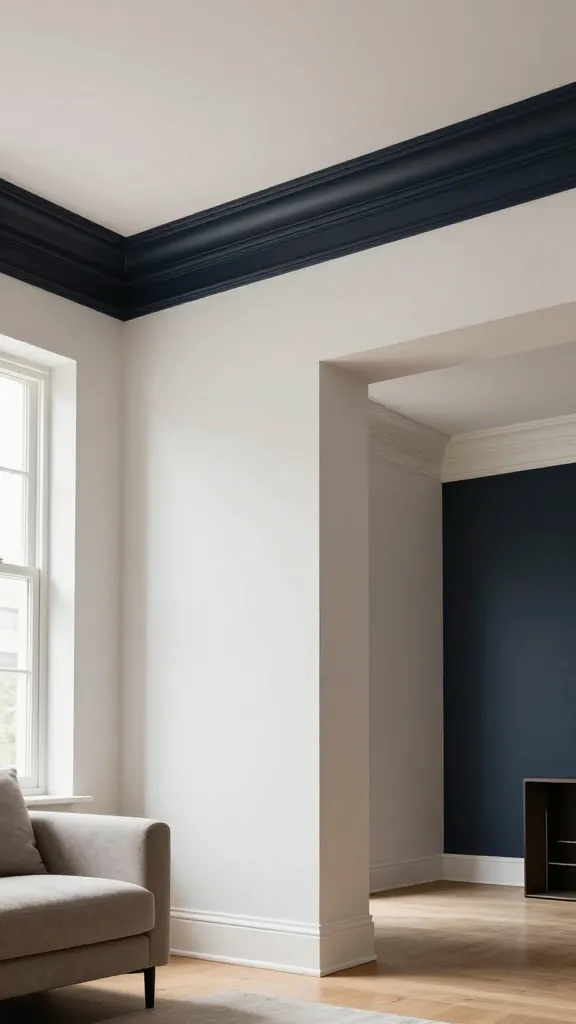
Feeling fearless? Paint your crown molding a contrasting color for crisp definition. Think white walls with black or deep navy molding—clean, graphic, unforgettable.
Great Combinations
- Warm White Walls + Charcoal Crown for a modern classic
- Greige Walls + Ivory Crown for subtle contrast
- Moody Walls + Bright White Crown for dramatic frames
Use this in living rooms, entryways, and anywhere you want a jaw-dropping first impression. FYI: it highlights ceiling lines, so prep and caulk carefully.
4. Add LED Cove Lighting Behind The Crown
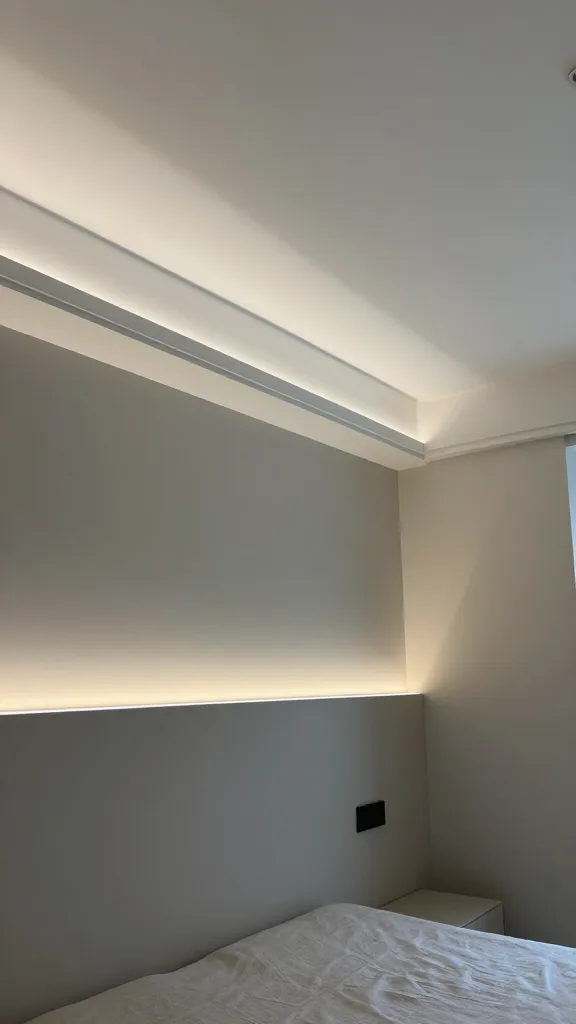
Nothing says custom like a soft ceiling glow. Install crown a few inches below the ceiling with a small ledge to hide LED strips and create instant ambiance.
What You’ll Need
- Crown molding with a gap or a dedicated cove profile
- Warm-dim LED strip (2700–3000K looks cozy)
- Continuous power supply and a dimmer
Use it in media rooms, bedrooms, or anywhere you want mood lighting that doesn’t scream “lamp.” It’s subtle, functional, and seriously cool.
5. Match Crown To Your Trim Style
Consistency wins. If you’ve got craftsman casings or simple modern baseboards, pick crown that speaks the same language.
Style Pairings
- Craftsman/Shaker: Boxy, stepped crown with clean lines
- Traditional: Classic ogee or dentil patterns
- Modern: Minimal cove or small stepped profiles
This creates a cohesive envelope so the room feels designed, not pieced together. Use this approach when renovating whole-house trim for a unified look.
6. Use Crown To Frame Built-Ins And Fireplaces
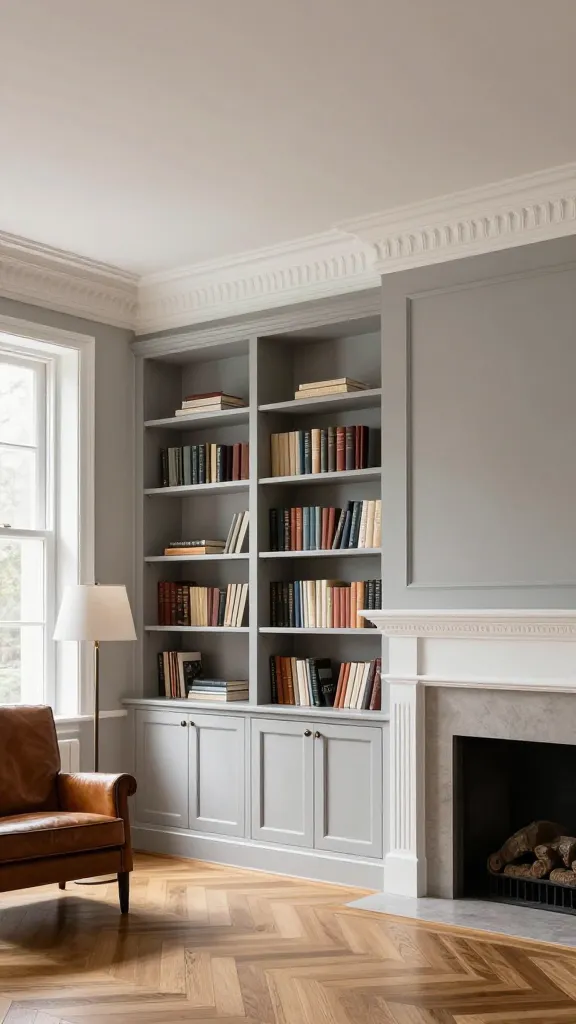
Your built-ins want a crown too. Running molding across the top of bookcases or fireplace surrounds ties everything to the architecture.
Smart Moves
- Carry the same crown around the room and across the built-ins
- Use a filler strip behind the crown to meet irregular ceilings
- Consider a shallow profile if you’ve got tall cabinets
This trick gives custom cabinetry energy for way less cost. Perfect for living rooms, libraries, and home offices that need gravitas.
7. Embrace Boxed Corners And Return Details
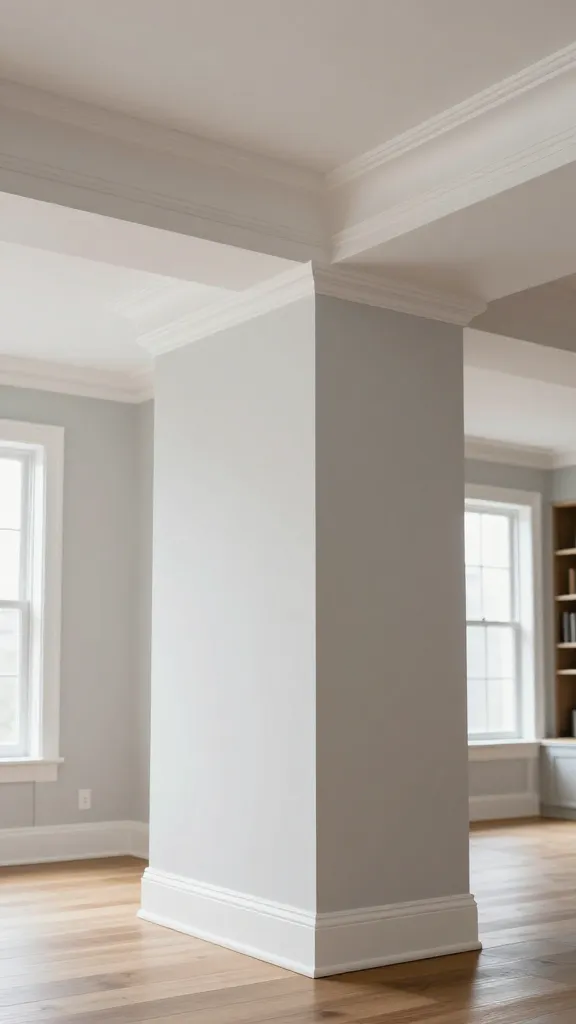
Little details separate “DIY attempt” from “pro job.” Boxed corners, crisp returns, and clean terminations make your crown molding look intentionally tailored.
Key Details
- Scarf joints on long runs to hide seams
- Outside corner blocks if you fear tricky miter cuts
- Returns at exposed ends for a finished edge
These finishing touches keep eyes on the beauty of the molding, not the mistakes. Use this everywhere, especially in rooms with lots of corners.
8. Try Foam Or PVC For Tricky Spaces
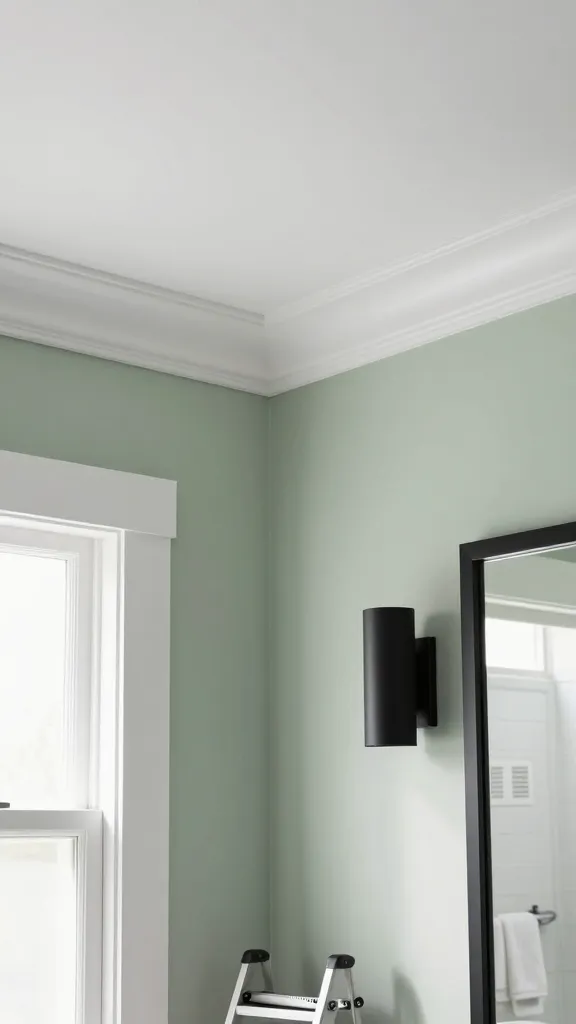
Old houses and humid bathrooms love to warp wood. Foam and PVC crown molding cuts easier, resists moisture, and paints beautifully.
When To Choose Alternatives
- Ceilings with waves or irregular angles
- High-humidity areas like bathrooms and kitchens
- DIY projects where lightweight material saves your arms (and sanity)
These materials look polished once caulked and painted. IMO, they’re a lifesaver when you want the look without the fuss.
9. Crown + Picture Rail Combo For Vintage Charm
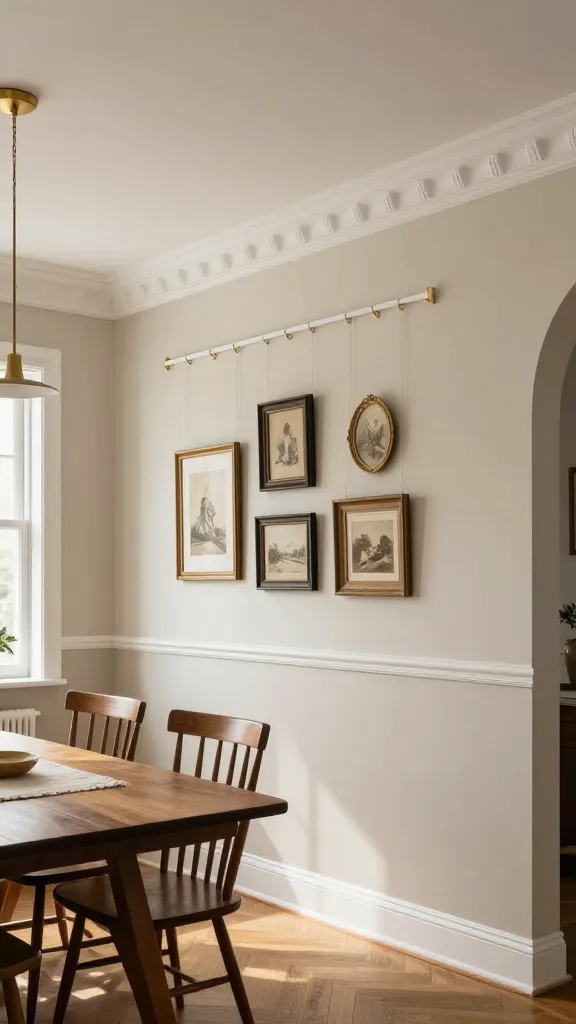
Blend crown molding with a picture rail a few inches below for layered character. You’ll get flexible art hanging and a period-correct vibe without drilling a million holes.
How To Place It
- Install crown as usual at the ceiling line
- Run a simple picture rail 8–18 inches below, depending on room height
- Paint the space between crown and rail the wall color for a banded effect
This combo looks amazing in dining rooms and hallways. It adds architectural depth and makes your art display feel curated, trust me.
Ready to give your ceilings a glow-up? Pick the idea that matches your home’s vibe, gather your materials, and start on one room. Small change, huge payoff—seriously, your walls will thank you.