6 Storage Bins Organization Ideas You’ll Wish You Tried Sooner
You’ve got the bins. Now let’s make them do more than sit there looking useful. These six strategies turn those plain containers into an organizational power move you’ll actually keep up with. Get ready for fewer “Where is my thing?” moments and more “Oh wow, that was easy.”
We’ll talk labels that make sense, stacking that won’t topple, and systems that survive real life. No perfection required—just smart tweaks that work hard. Ready?
1. Create A Bin “Zoning” System (So You Don’t Dig For Hours)
Random bins breed chaos. Zones stop the scavenger hunts and make putting things away a no-brainer. Think of each shelf or closet section as a neighborhood with its own vibe.
How To Set It Up:
- Pick 3–6 zones max: Examples include Cleaning, Tools, Gifts & Wrap, Seasonal Decor, Pantry Backstock, Kid Crafts.
- Assign a shelf or rack per zone: Keep like with like and you’ll instinctively know where stuff lives.
- Use color or material cues: Clear bins for pantry, woven for living spaces, opaque for visual clutter.
Create simple “traffic rules” for your zones: every item gets a home, every bin hosts one category only. This cuts decision fatigue and helps everyone else in the house play along, FYI.
Pro Tips:
- Place daily-use zones at eye level, seasonal stuff up high, heavy items down low.
- Use one oversized “quarantine” bin for items you might donate or relocate. Review it monthly.
- Post a zone map inside the closet door if you’re managing shared spaces.
Use this when you’re drowning in bins but nothing has a consistent place. The payoff: faster cleanup and fewer duplicates.
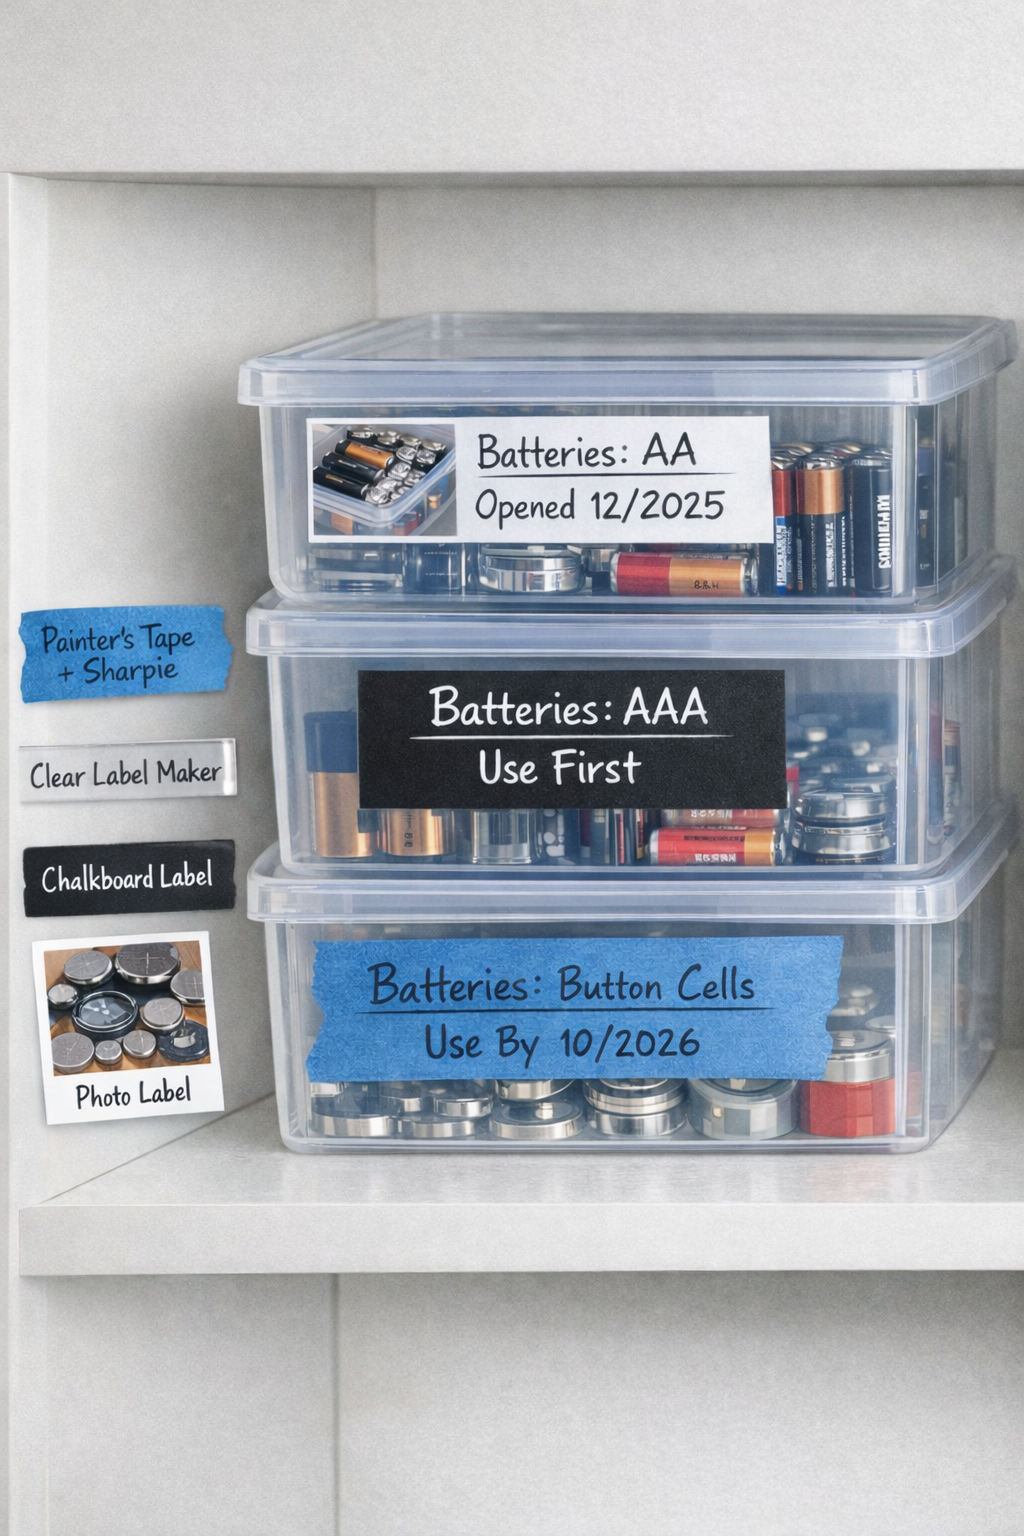
2. Label Like You Mean It (With Dates, Not Just Names)
Labels aren’t just for looks—they’re your memory on a sticker. Clear labels cut guesswork, and adding dates or subcategories keeps categories from ballooning into junk drawers.
Smart Label Formula:
- Main Category: Batteries
- Subcategory: AA, AAA, Button Cells
- Date/Note: “Opened 12/2025” or “Use First”
That tiny timestamp? It stops the “Is this expired?” saga. Plus, it nudges you to use what you already have.
Labeling Options (From Chill To Fancy):
- Painter’s tape + Sharpie: Fast, readable, and adjustable.
- Clear label maker tape: Clean look, great for clear bins.
- Chalkboard labels: Perfect for rotating categories like seasonal decor.
- Photo labels: Snap the contents and print a small pic for visual kiddos or partners who “can’t find anything.”
Stick labels on the top and front so you can see them when stacked or shelved. Use this approach for pantries, craft rooms, and garages—anywhere you fight clutter creep.
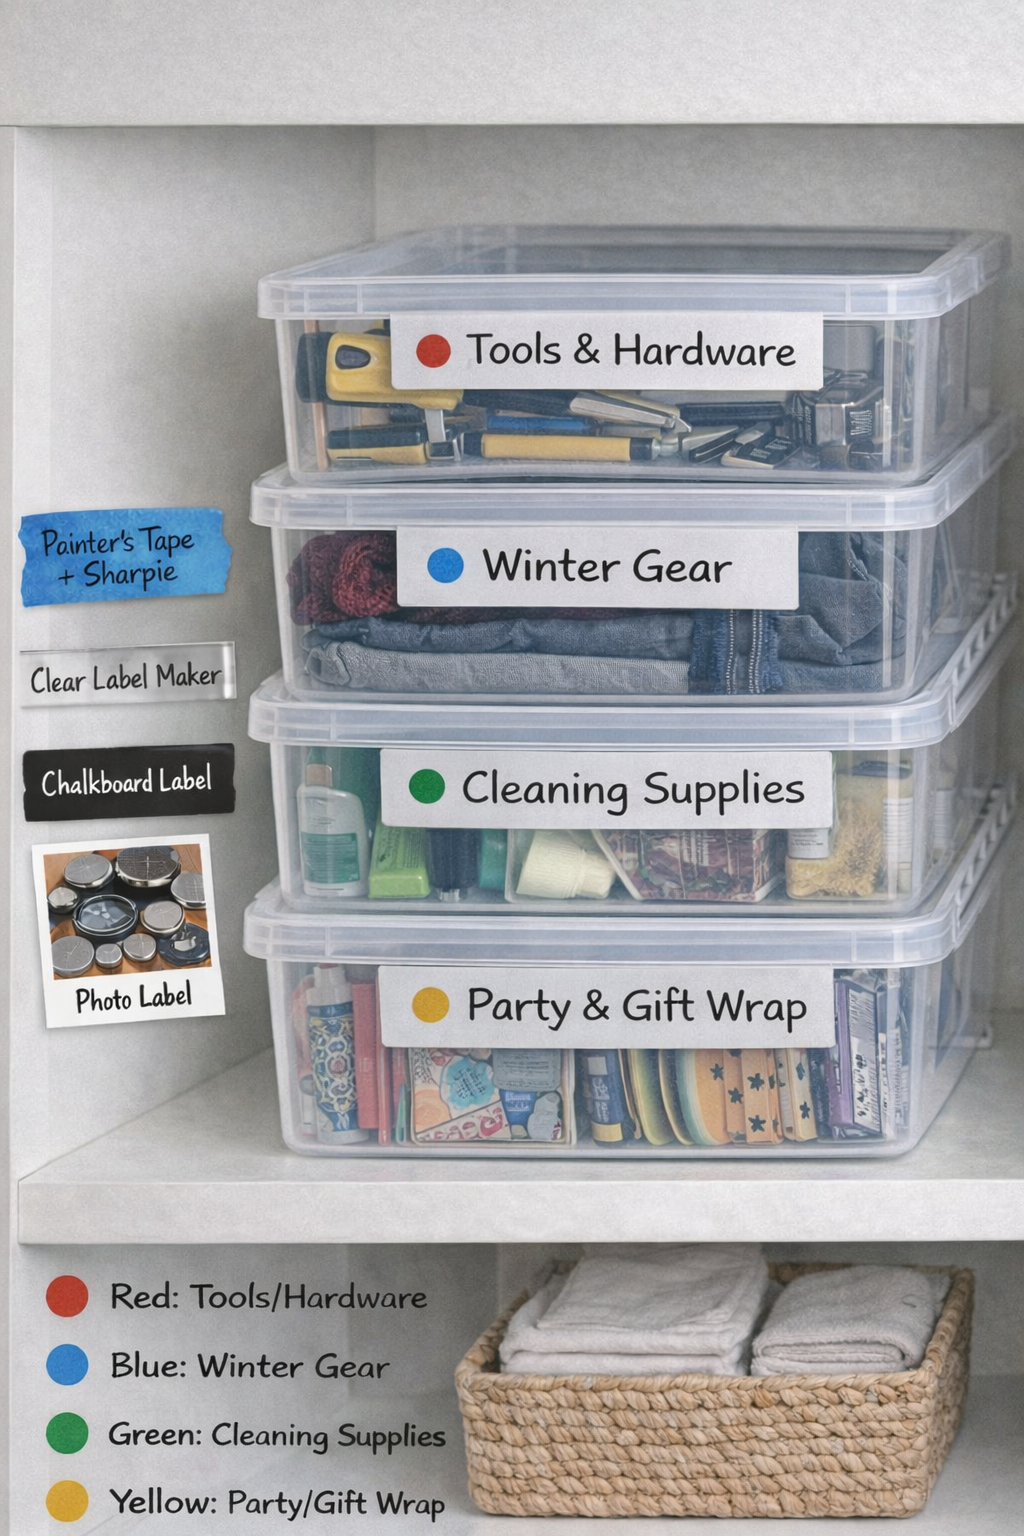
Bonus: Color-Coded Icons
- Red dot for tools/hardware
- Blue for winter gear
- Green for cleaning supplies
- Yellow for party/gift wrap
Icons make it faster for kids and visual learners. Plus, it looks weirdly satisfying on a shelf, and IMO, that’s half the battle.
3. Stack Safely And Strategically (No Avalanche Required)
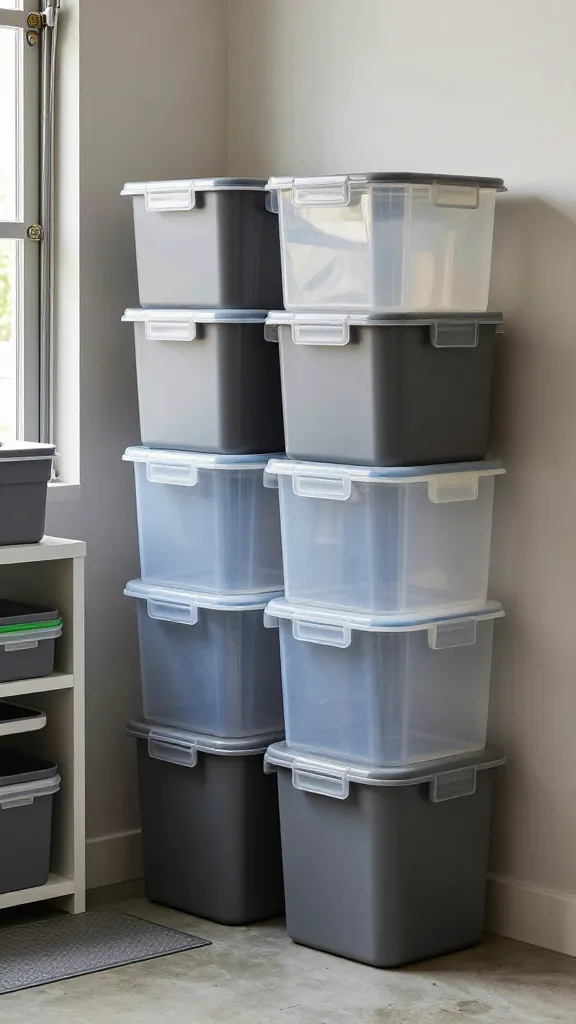
Stacking saves floor space, but do it wrong and you’ll never touch the bottom bin again. Build a stack you can access quickly without a workout.
Stacking Rules That Actually Work:
- Heavy on bottom, light on top—yes, obvious, but also the reason your holiday lights got crushed last year.
- Use latching lids if you stack more than two high. Stability matters.
- Uniform sizes per stack to avoid wobble. Keep mismatched bins on separate shelves.
- Leave a “finger gap” between stacks and walls for easy grab-and-go.
Consider stacking furniture: add a small wire shelf, cube organizer, or sturdy plank between rows so each bin acts like a drawer. Your back will send a thank-you note.
When To Use Clear Vs. Opaque:
- Clear bins: Great for supply-heavy zones (pantry, crafts, office) where you need quick visual confirmation.
- Opaque bins: Use for visual clutter (toys, cords, decor), especially in living spaces.
Stacking works best in garages, basements, and tiny closets. The benefit: you’ll stop restacking towers like you’re playing Jenga every Saturday.
4. Divide Inside The Bin (Because “Misc” Isn’t A Category)
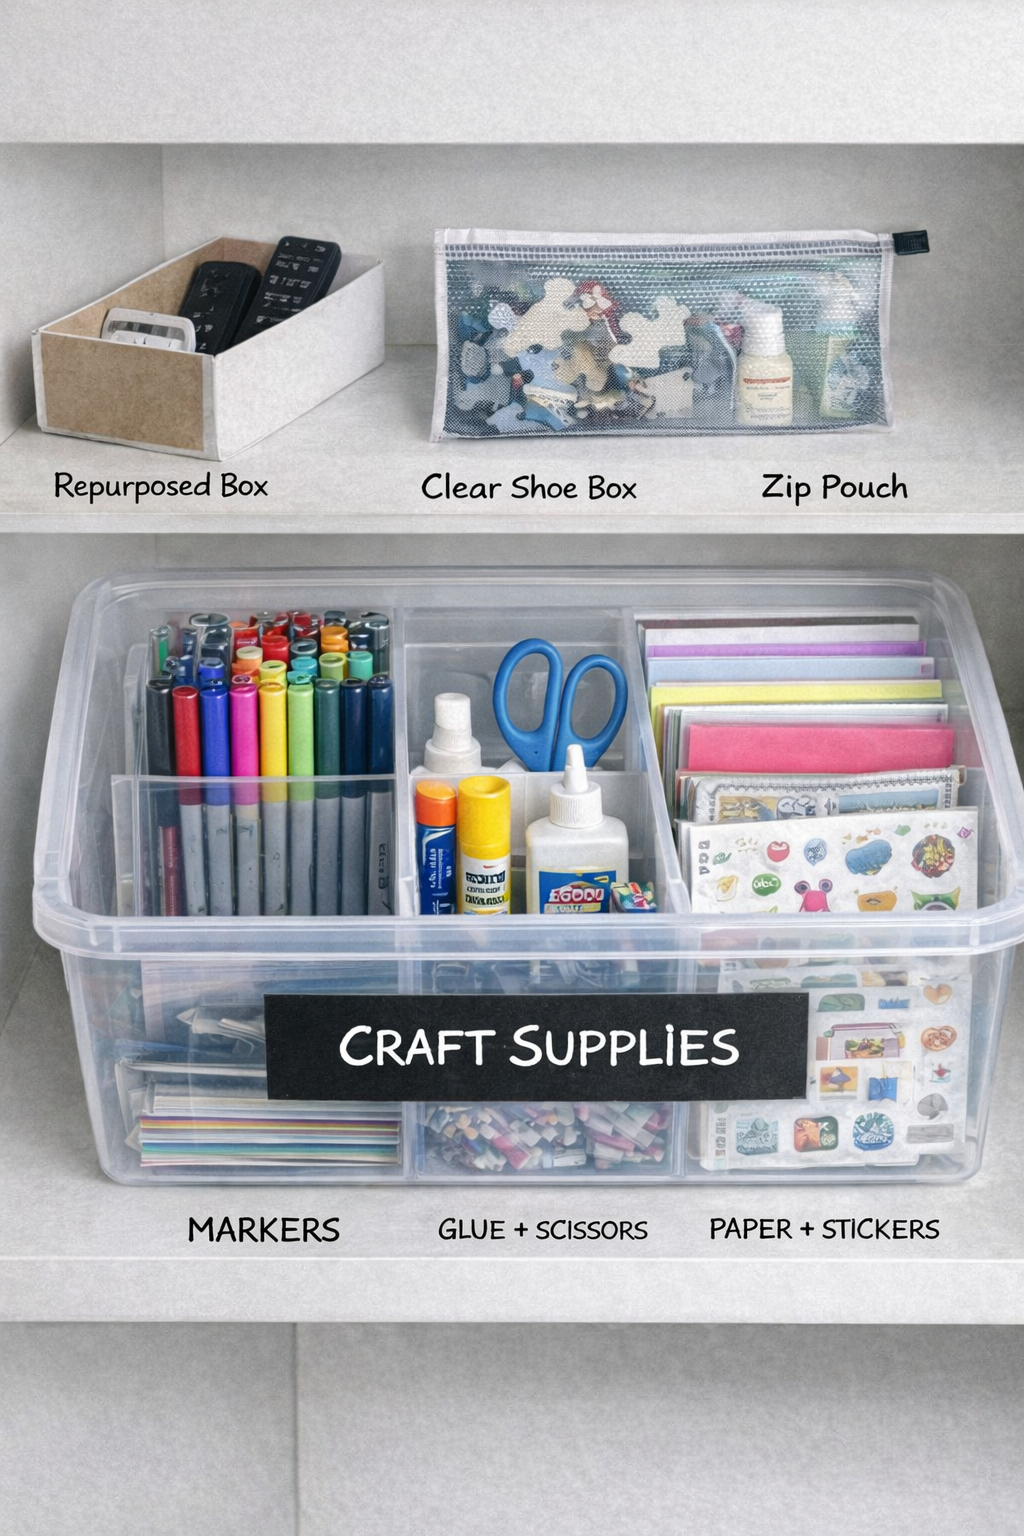
Bigger bins hide mess inside if you don’t break them up. Dividers turn one big space into mini zones, so small items stop migrating and multiplying.
Divider Ideas That Don’t Cost Much:
- Clear shoe boxes for cords, tape rolls, first-aid refills.
- Zip pouches for puzzles, game pieces, or travel-size toiletries.
- Adjustable drawer dividers inside wider bins for seasonal accessories.
- Repurposed boxes (tissue, cereal cut-downs) for a budget-friendly start.
Think function-specific kits inside each bin. You’re not organizing “crafts”—you’re organizing “markers,” “glue + scissors,” and “paper + stickers.” Same idea, way less chaos.
Build Micro-Kits:
- Gift Wrap Bin: ribbon pouch, tag pouch, tape + scissors case, fold-flat gift bags.
- Home Repair Bin: hanging kit, furniture pads, felt sliders, command hooks.
- Pet Care Bin: meds, travel leash, grooming gloves, spare tags.
Divide-and-conquer works best for households with lots of small parts—parents, crafters, DIYers. You’ll reach for what you need without dumping an entire bin. Magical, seriously.
5. Rotate Seasonally With “In/Out” Bins (Set It And Forget It)
Seasonal stuff clogs closets because last season never fully leaves. Make a simple rotation so each switch takes minutes, not hours.
The “In/Out” System:
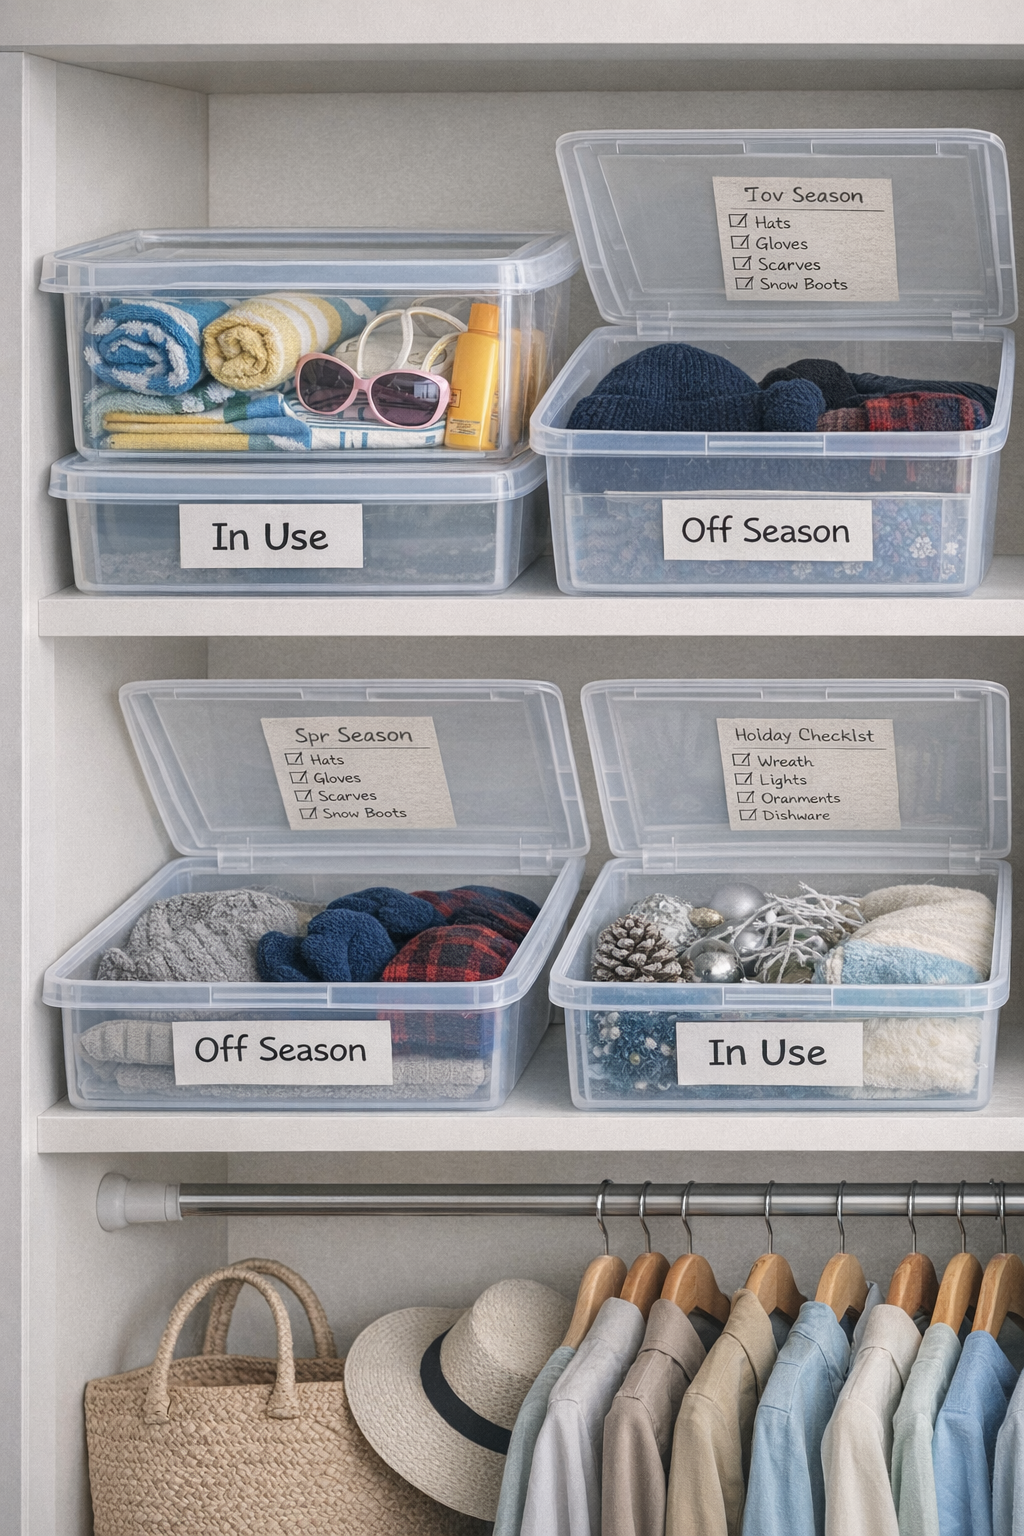
- Two bins per season: one labeled “In Use,” one labeled “Off Season.”
- When seasons change, swap contents and move the off-season bin up high or out of sight.
- Include a purge rule: if it didn’t get used this season, it goes to donate or sell.
You can apply this to clothes, sports gear, linens, and decor. Add a tiny checklist inside the lid to remind you what lives there—helps with holiday setups and packing for trips too.
What To Include By Category:
- Clothing: hats, gloves, scarves, swimwear, sandals.
- Outdoor Gear: snow gear, beach umbrellas, picnic supplies.
- Decor: mantle decor, wreaths, lights, themed dishware.
- Linens: flannel sheets vs. lightweight quilts, seasonal pillow covers.
Use breathable bins for fabrics and airtight for items that attract dust or bugs. The benefit: you’ll reclaim prime closet real estate and stop buying one more beanie “just in case.”
6. Make Bins Work Like Drawers (Pull, See, Done)
If you can’t see it, you won’t use it. Turn shelves into a pull-out system, even without fancy cabinetry. You’ll end the dreaded “remove three bins to reach the fourth” routine.
Low-Effort Ways To Add Pull-Out Access:
- Use bins with built-in handles and label the handle side.
- Stick felt pads or furniture sliders on bin bottoms so they glide out easily.
- Add a shallow shelf or wire rack to create two “drawers” per shelf.
- Install inexpensive rolling drawer tracks or a slide-out basket if you want extra credit.
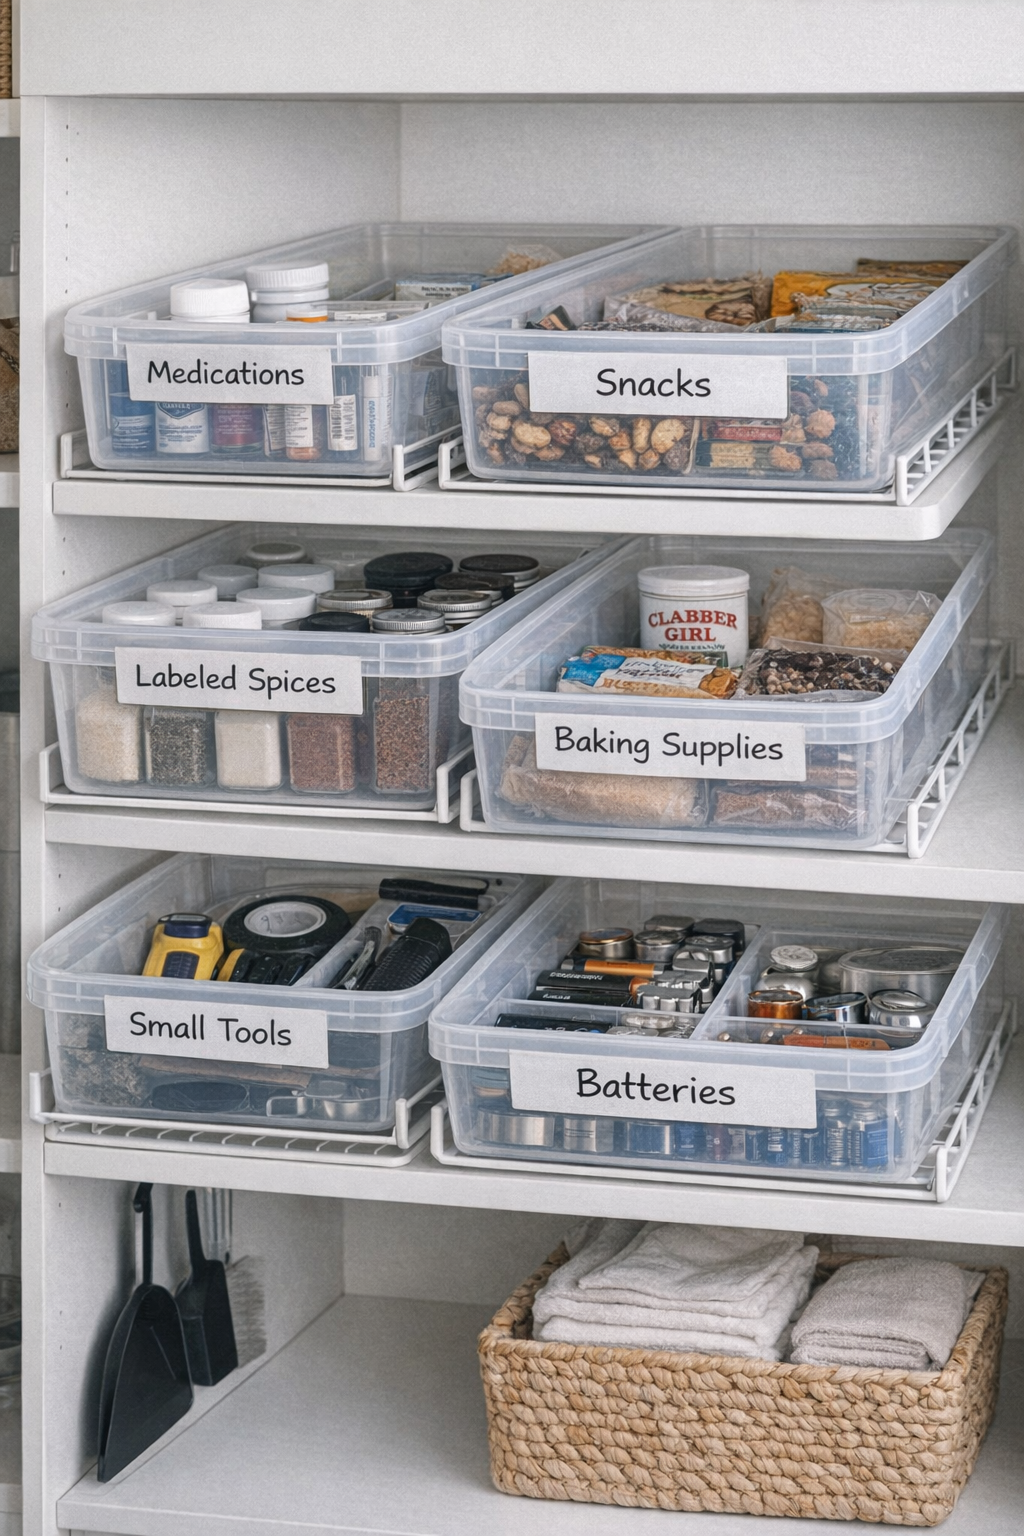
For deep pantries or utility closets, go for shallow, wide bins over deep ones. You’ll see more at a glance and stop forgetting what lives in the back.
What To Store In “Drawer-Style” Bins:
- Pantry Backups: canned goods, snacks, baking supplies, pasta.
- Bathroom Extras: toiletries, paper goods, cleaning tablets.
- Office/Crafts: printer paper, paints, notebooks, label refills.
Set a “one in, one out” rule for these bins to maintain the vibe. The win: easier access, faster resets, and fewer pantry mysteries.
Ready to give your bins an actual job description? Pick one idea and try it in a single closet or shelf. Then ride that momentum and tweak as you go—organization should support your life, not the other way around. You’ve got this, and your future self will be obnoxiously grateful.